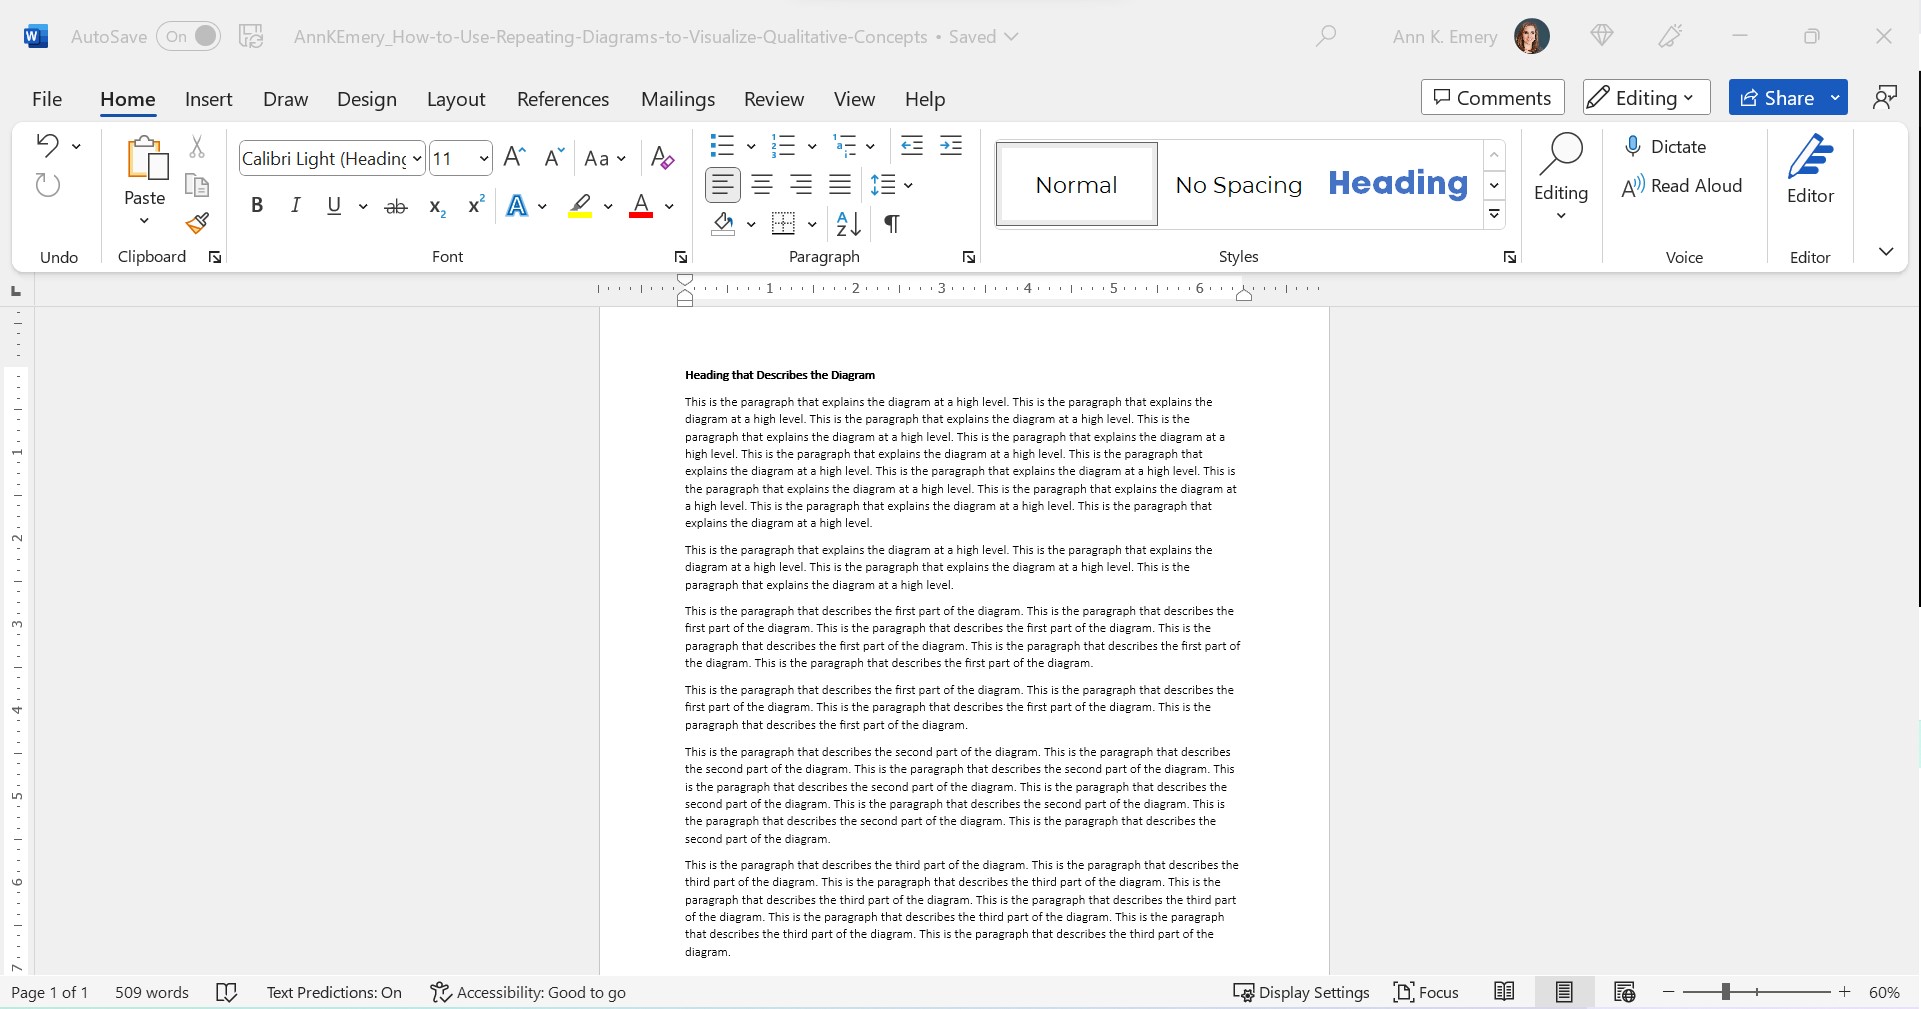
This is the status quo.
But it doesn’t have to be!!!
Let’s stop hiding important qualitative concepts inside Text Walls that no one reads.
Step 0: Take Pride in Your Report’s Formatting
We’ll use landscape so that it’s easier to see on a landscape computer screen.
We’ll add the organization’s Theme Colors and Theme Fonts so that the document looks professional and enhances branding.
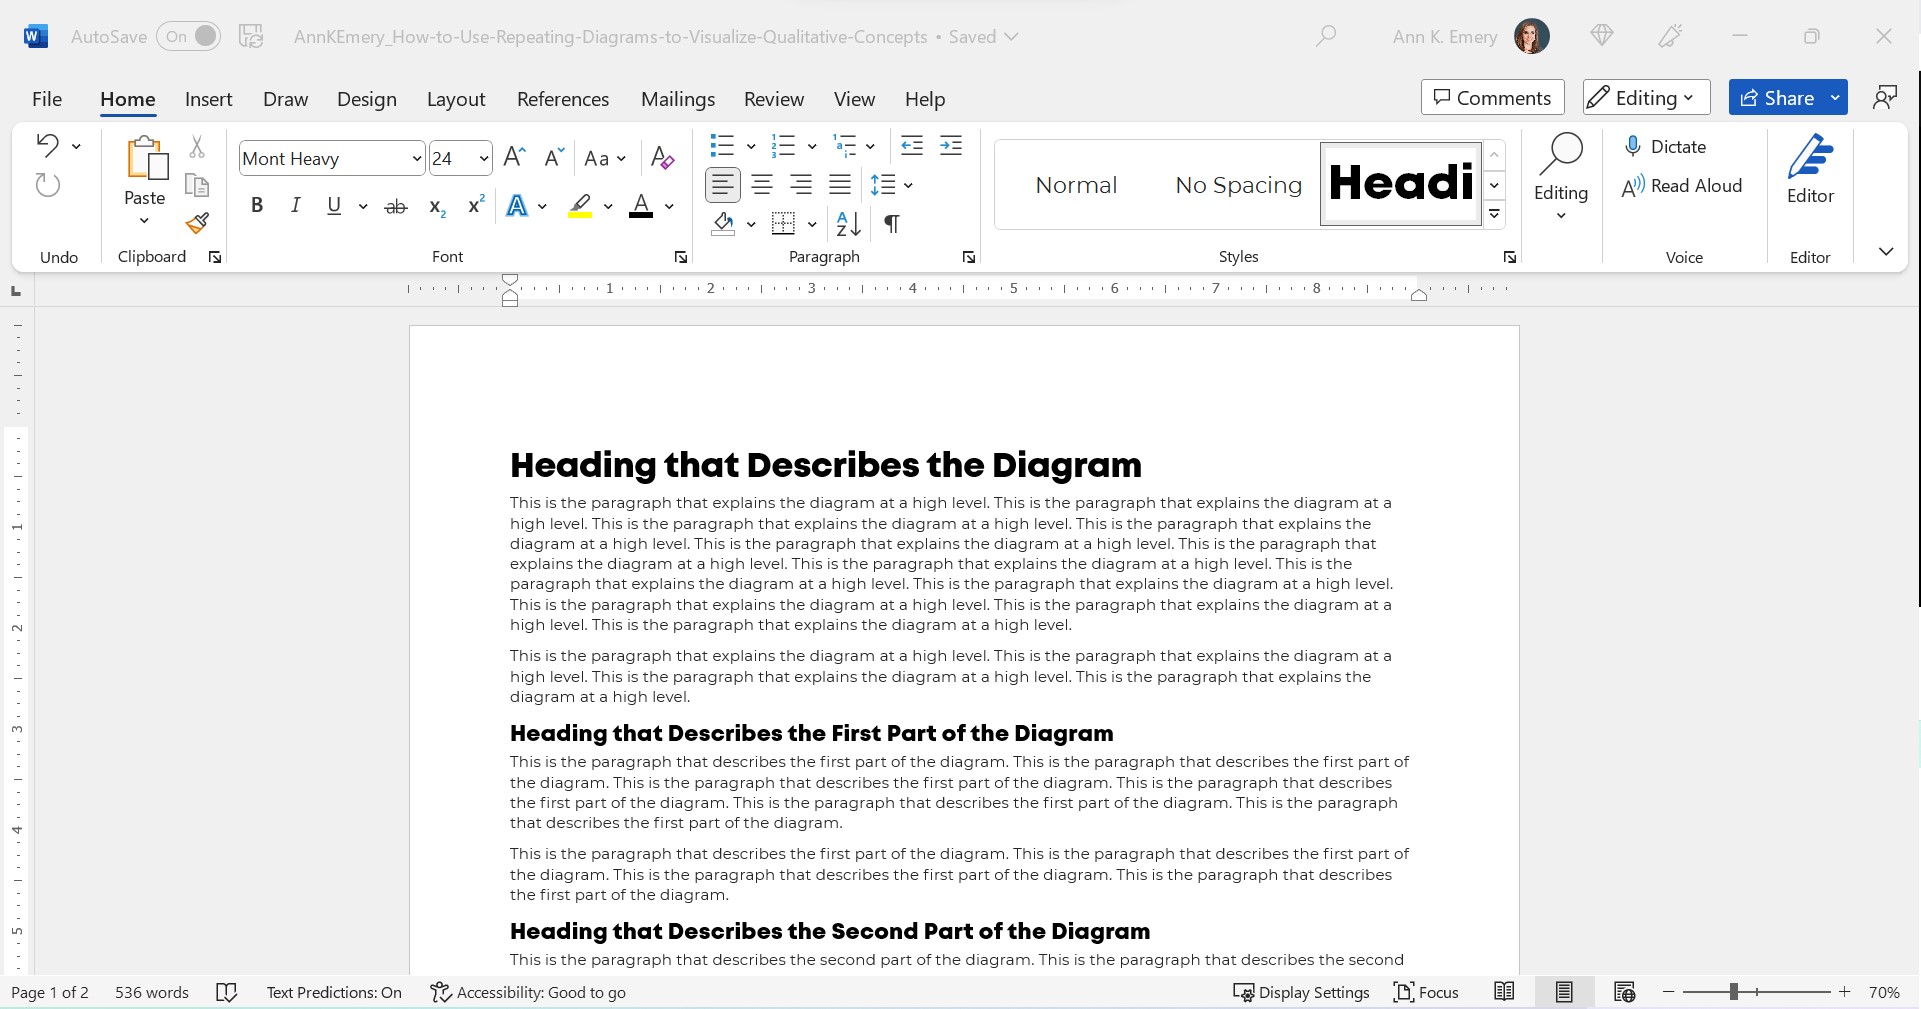
We’ll add a Text Hierarchy. Instead of a single Heading 1, we need to add several Heading 2s. We also need to enlarge all the font sizes. No more puny size 12 or 14 for headings!!
In this example:
- the Heading 1 is size 24 bold in a brand color,
- the Heading 2s are size 16 bold in a brand color, and
- the body font is size 11 in dark gray. (Not black, which causes eye strain and makes people think of funerals, at least according to my graphic design friends.)
Step 1: Choose Your Diagram
I like to scroll through SmartArt for ideas.
You can also browse Diagrammer, which is SmartArt on steroids.
Here are the most common diagrams I’ve used to visualize qualitative concepts in research and evaluation projects:
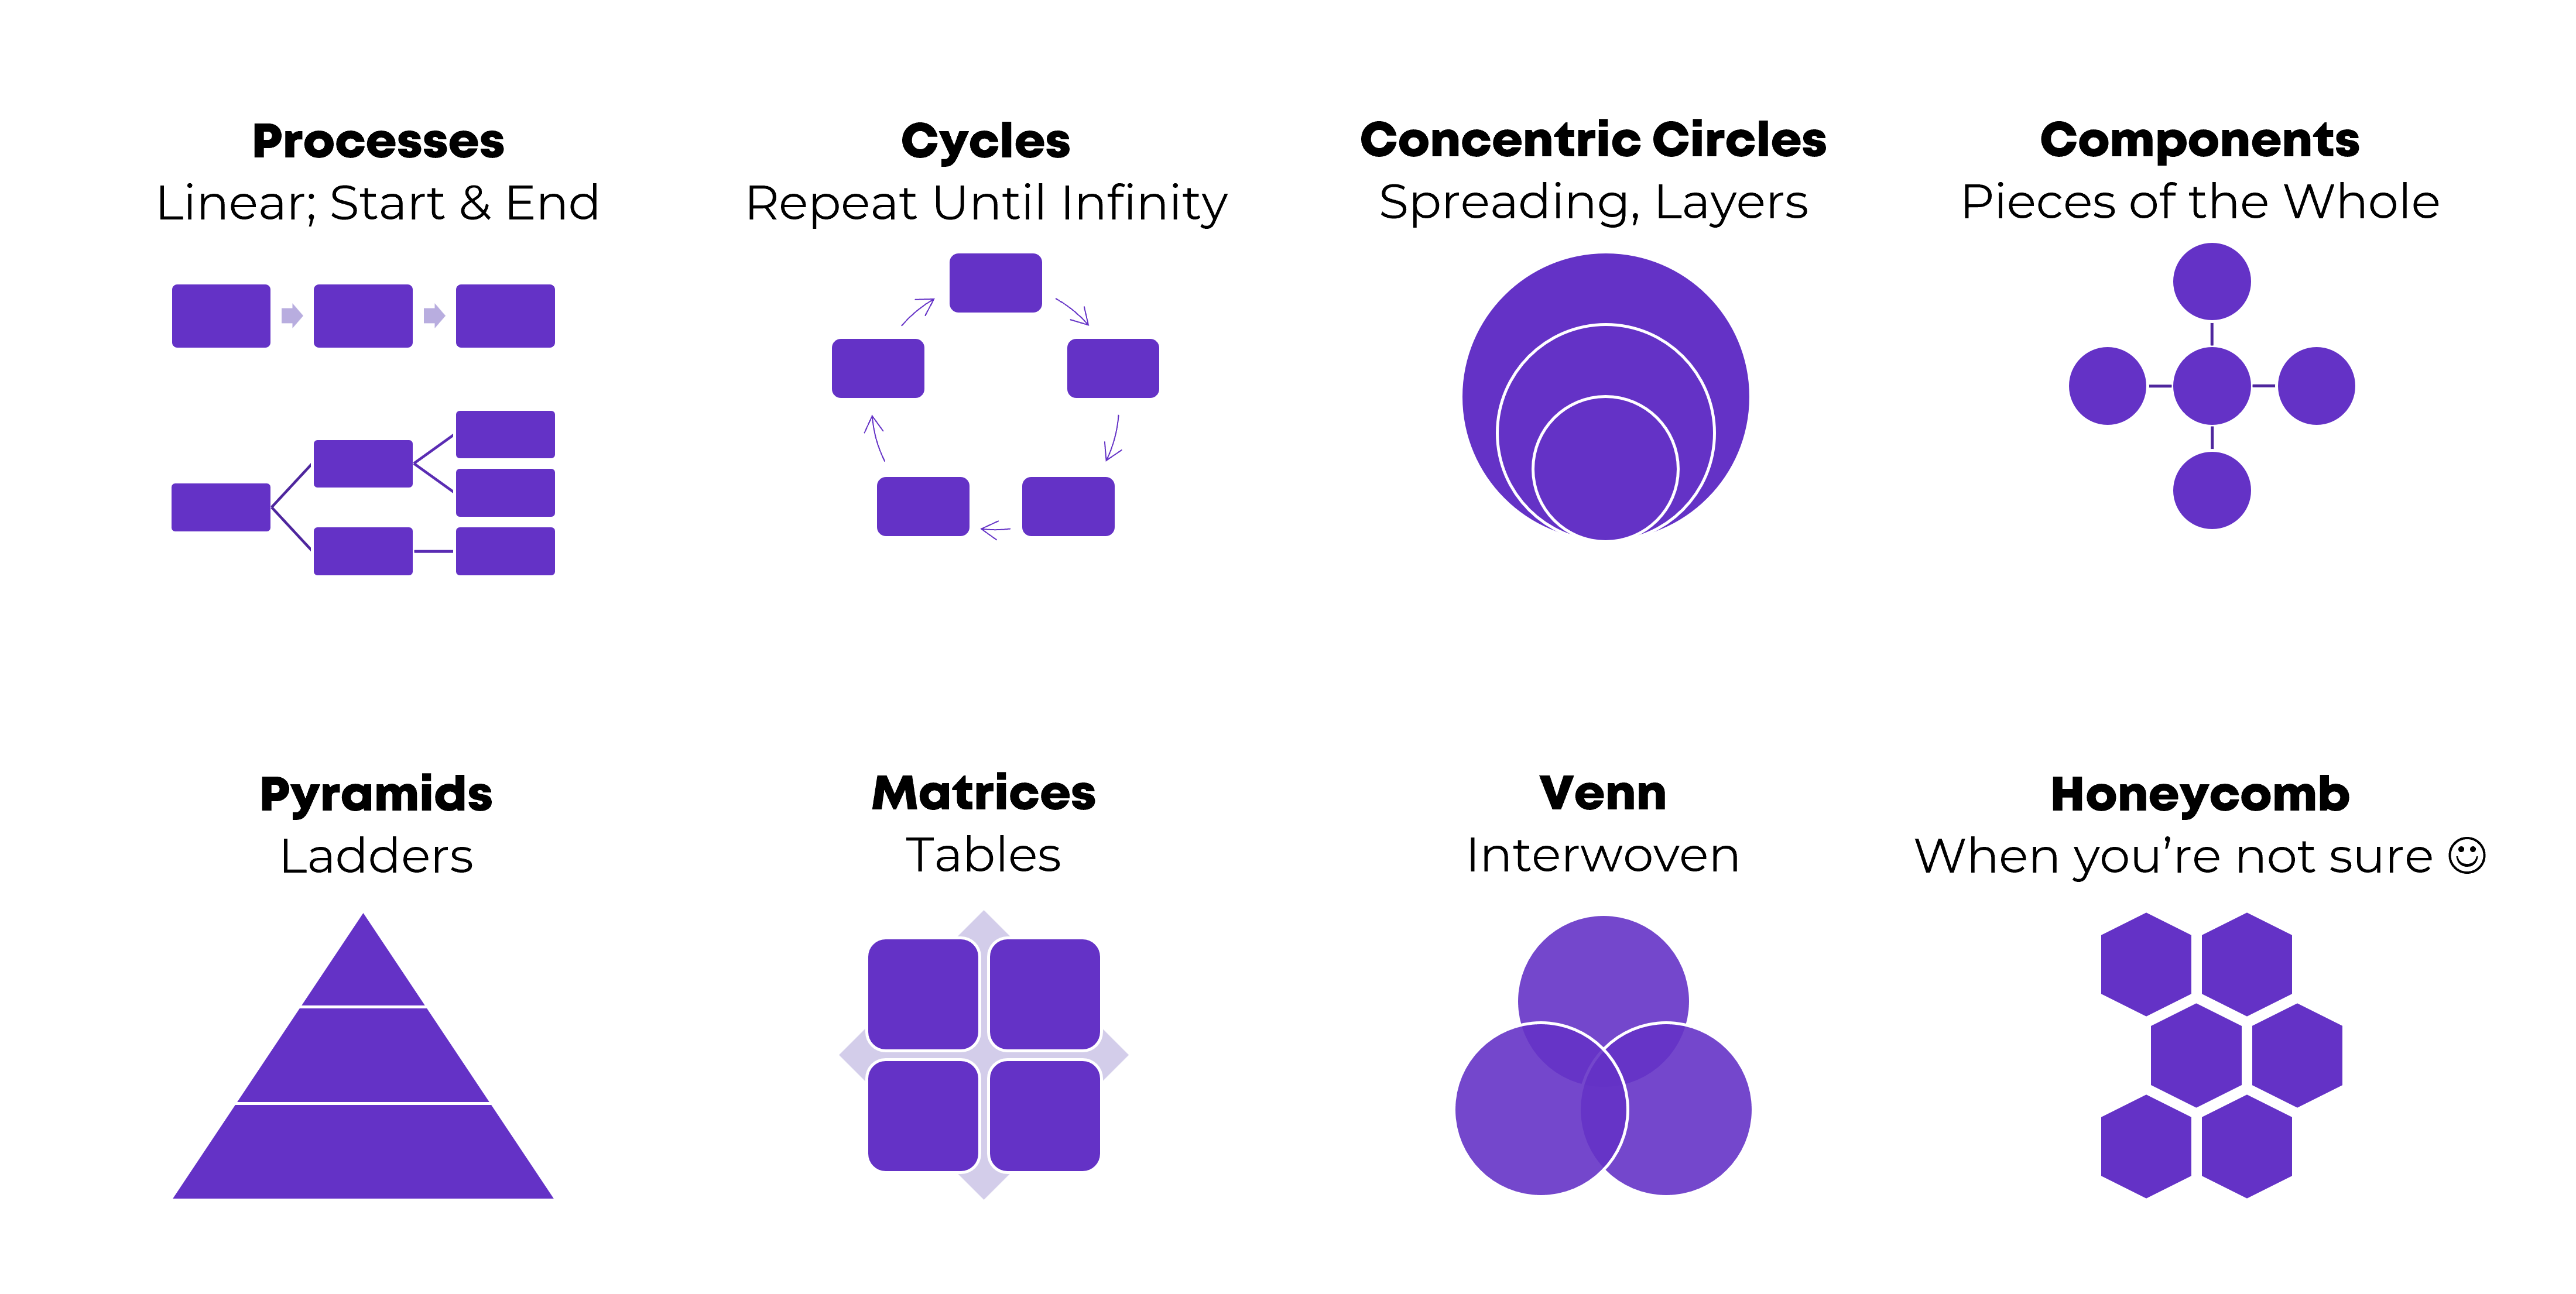
Processes
Processes are for linear, step-by-step concepts. There’s a defined start and end.
Examples:
- A lot of my own training programs, where I teach how-to instructions for dataviz.
- Logic models.
- Research methods (e.g., we recruited participants, and then they did this, and then they did this).
Cycles
Cycles are for processes that loop around and around until infinity.
Example:
- The program evaluation lifecycle, in which you plan for the evaluation, collect the data, analyze the results, use the data to inform decisions… and then start the process all over again.
Concentric Circles
Concentric circles are for spreading concepts and for inner, middle, and outer layers.
Example:
- An agency made a plan to improve diversity, equity, and inclusion. They identified three layers of changes needed: at the individual level, at the departmental level, and at the agency level.
Components
Components are for pieces of the whole—when you want to show that all these random things aren’t so random; they’re connected. They’re just not connected as a linear process or as a cycle.
Examples:
- In my master’s thesis, I researched how nonprofit organizations were using data to have a bigger impact on the community. In the literature review, I identified ~10 specific examples of data use, which were all related to the broader theme of data use.
- The U.S. Surgeon General’s Framework for Workplace Mental Health & Wellness (scroll down a bit here).
Pyramids
Pyramids, or ladders, are for concepts that build upon one another. The base layer is the foundation, the middle layer builds upon it, and you’re aiming for the pinnacle at the very top.
Example:
- In my Report Redesign classes, I organized the techniques into a pyramid. Participants learn the foundational skills, then the slightly narrower skills, then the nitty-gritty details that pull everything together.
Matrices
Matrices are fancy tables or plots.
Examples:
- This blog post about four types of dashboards.
- Lots of diagrams from McKinsey.
Venn Diagrams
Venn Diagrams are for interwoven, overlapping components.
Example:
- A project involving several groups of people, who all come together to advocate for their issue.
Honeycomb
Honeycombs, meh. I don’t love these. They’re overused, along with the gears. If you’re not sure what else to use, this is still better than a Text Wall.
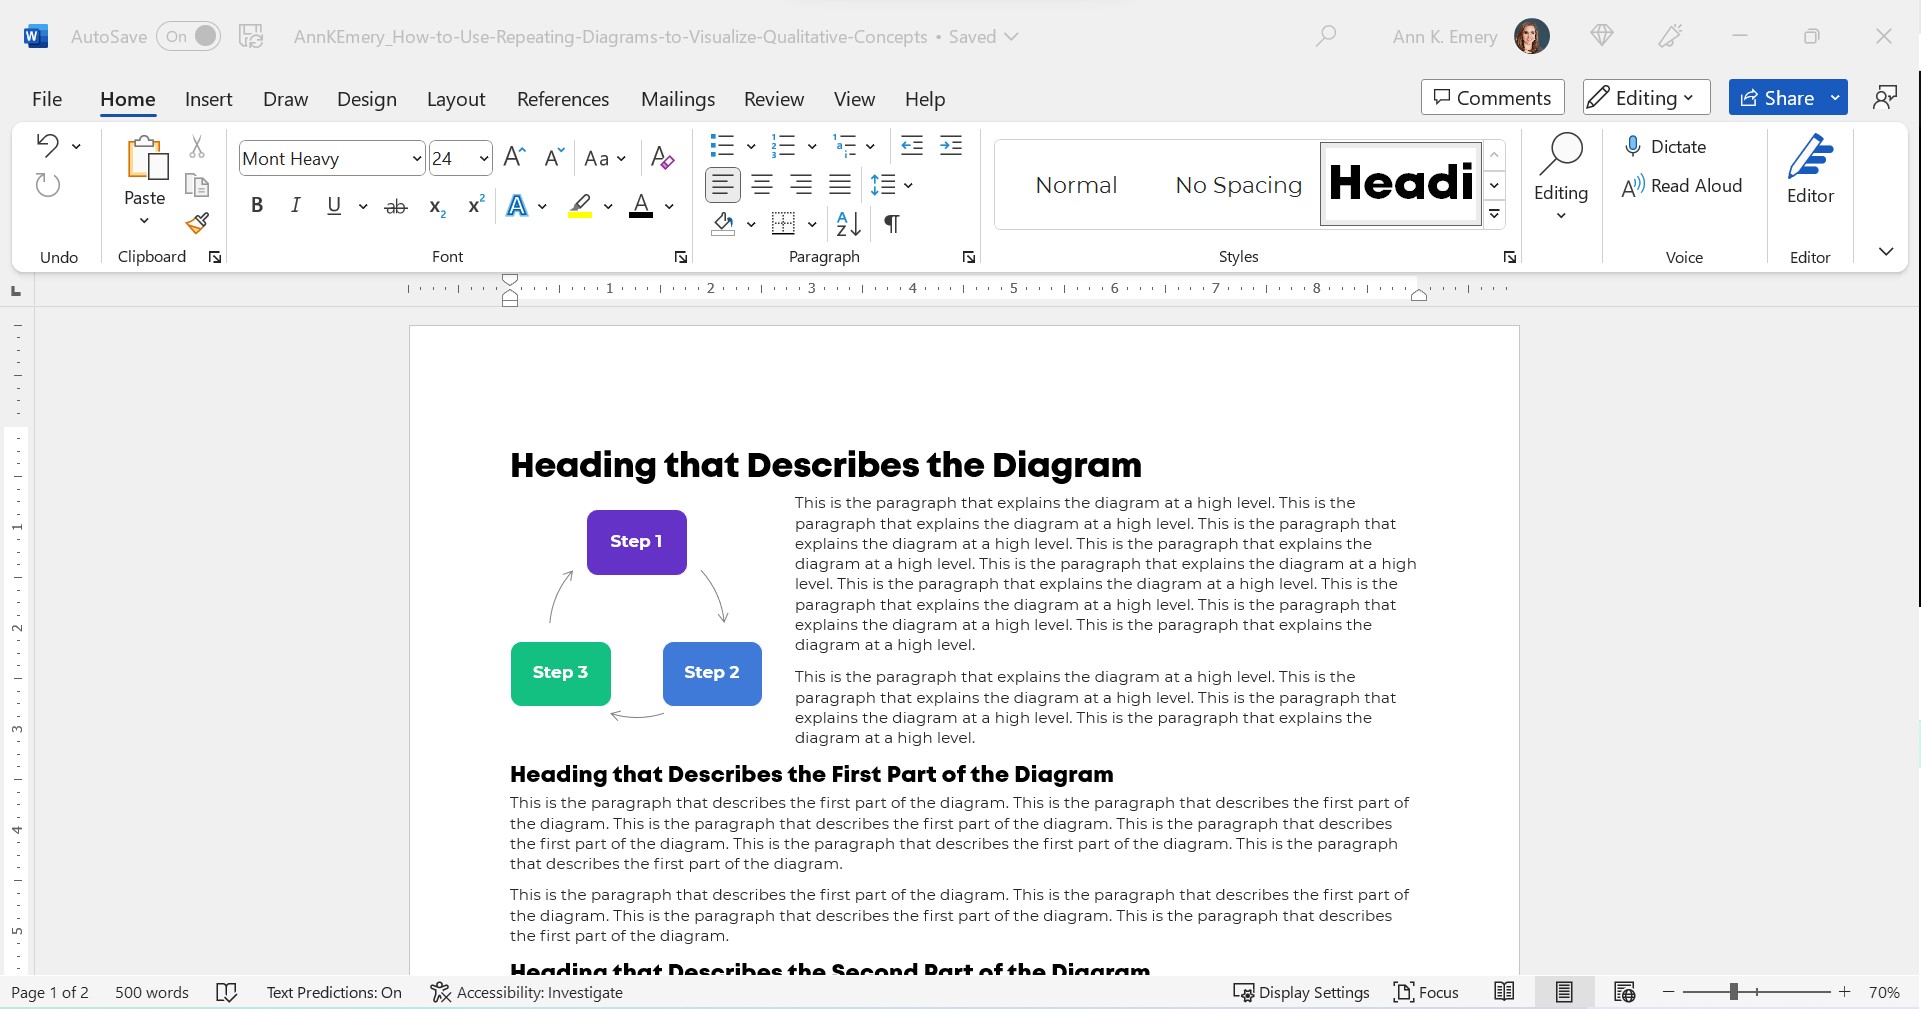
Step 2: Introduce Your Diagram
Show the fully-colored diagram.
Don’t cram too much text on the diagram itself. In this example, I’m pretending we’re describing three steps, which repeat over and over.
Add a paragraph or two to explain the diagram at a high level.
Make sure there’s plenty of color contrast by using bold white or bold black text against your brand colors. Use this color contrast checker to figure out which font color to use.
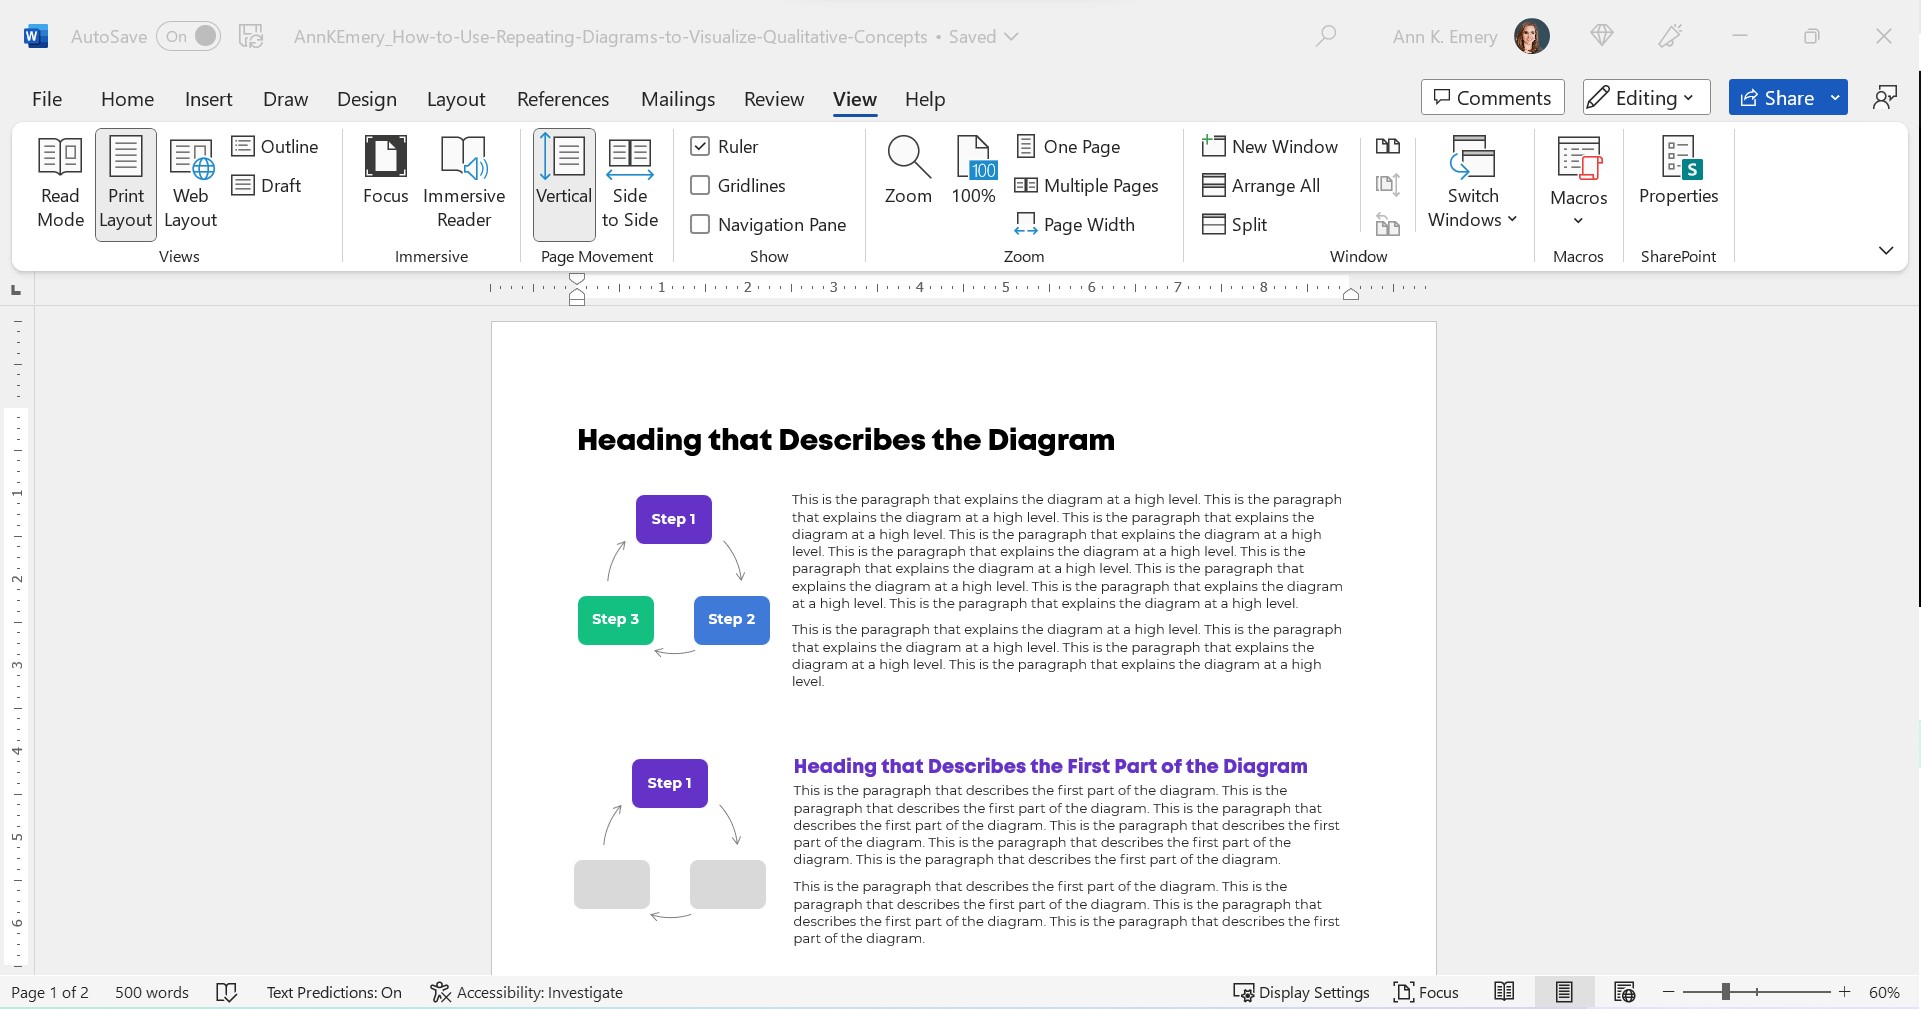
Step 3: Repeat Your Diagram
Here’s the important part: Repeat your diagram as you explain each segment in more detail.
Copy and paste the diagram.
Then, gray everything out, and just highlight the segment you’re explaining in a dark brand color.
For bonus points, you can color-code the Heading 2s to match the diagram.
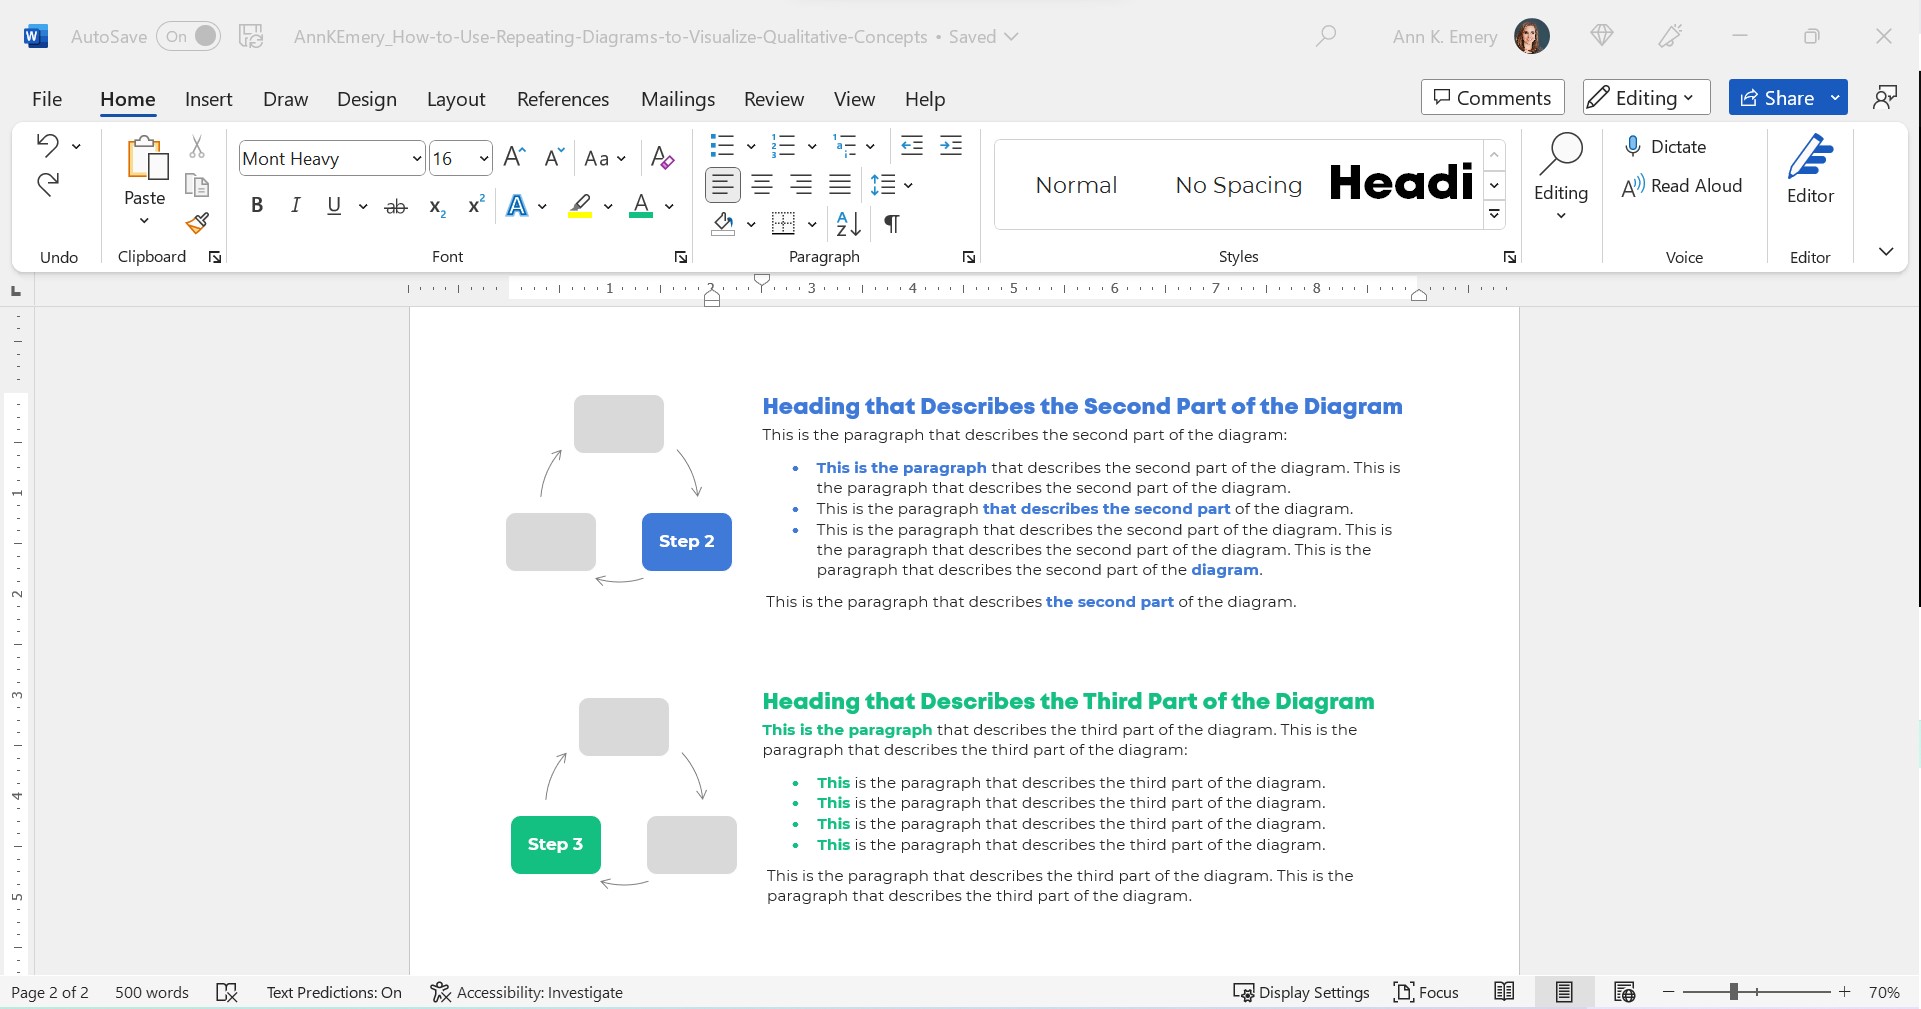
Make sure your colors are consistent with what you introduced earlier!!! You wouldn’t want Step 1 to be purple, and then blue, and then green.
I usually delete the words from the diagram that I’m not currently explaining. For example, when explaining Step 1, I delete the words Step 2 and Step 3 from the diagram. I don’t want any issues with color contrast; the white font wouldn’t be legible against the light gray diagram, so I simply delete it.
Make sure there’s plenty of white space between sections. I use at least 0.5 inches of white space (e.g., between the diagram and its paragraph, between the paragraphs).
For bonus points, break up the paragraphs into points and bold a few key words. Long paragraphs are dated. Readers expect short, skimmable paragraphs these days.
Check out the paragraphs in this blog post, for example. They’re 1-4 sentences long. There are lots of headings. There’s bolding to increase skimmability.
This blog post is also written at a 7th grade reading level.
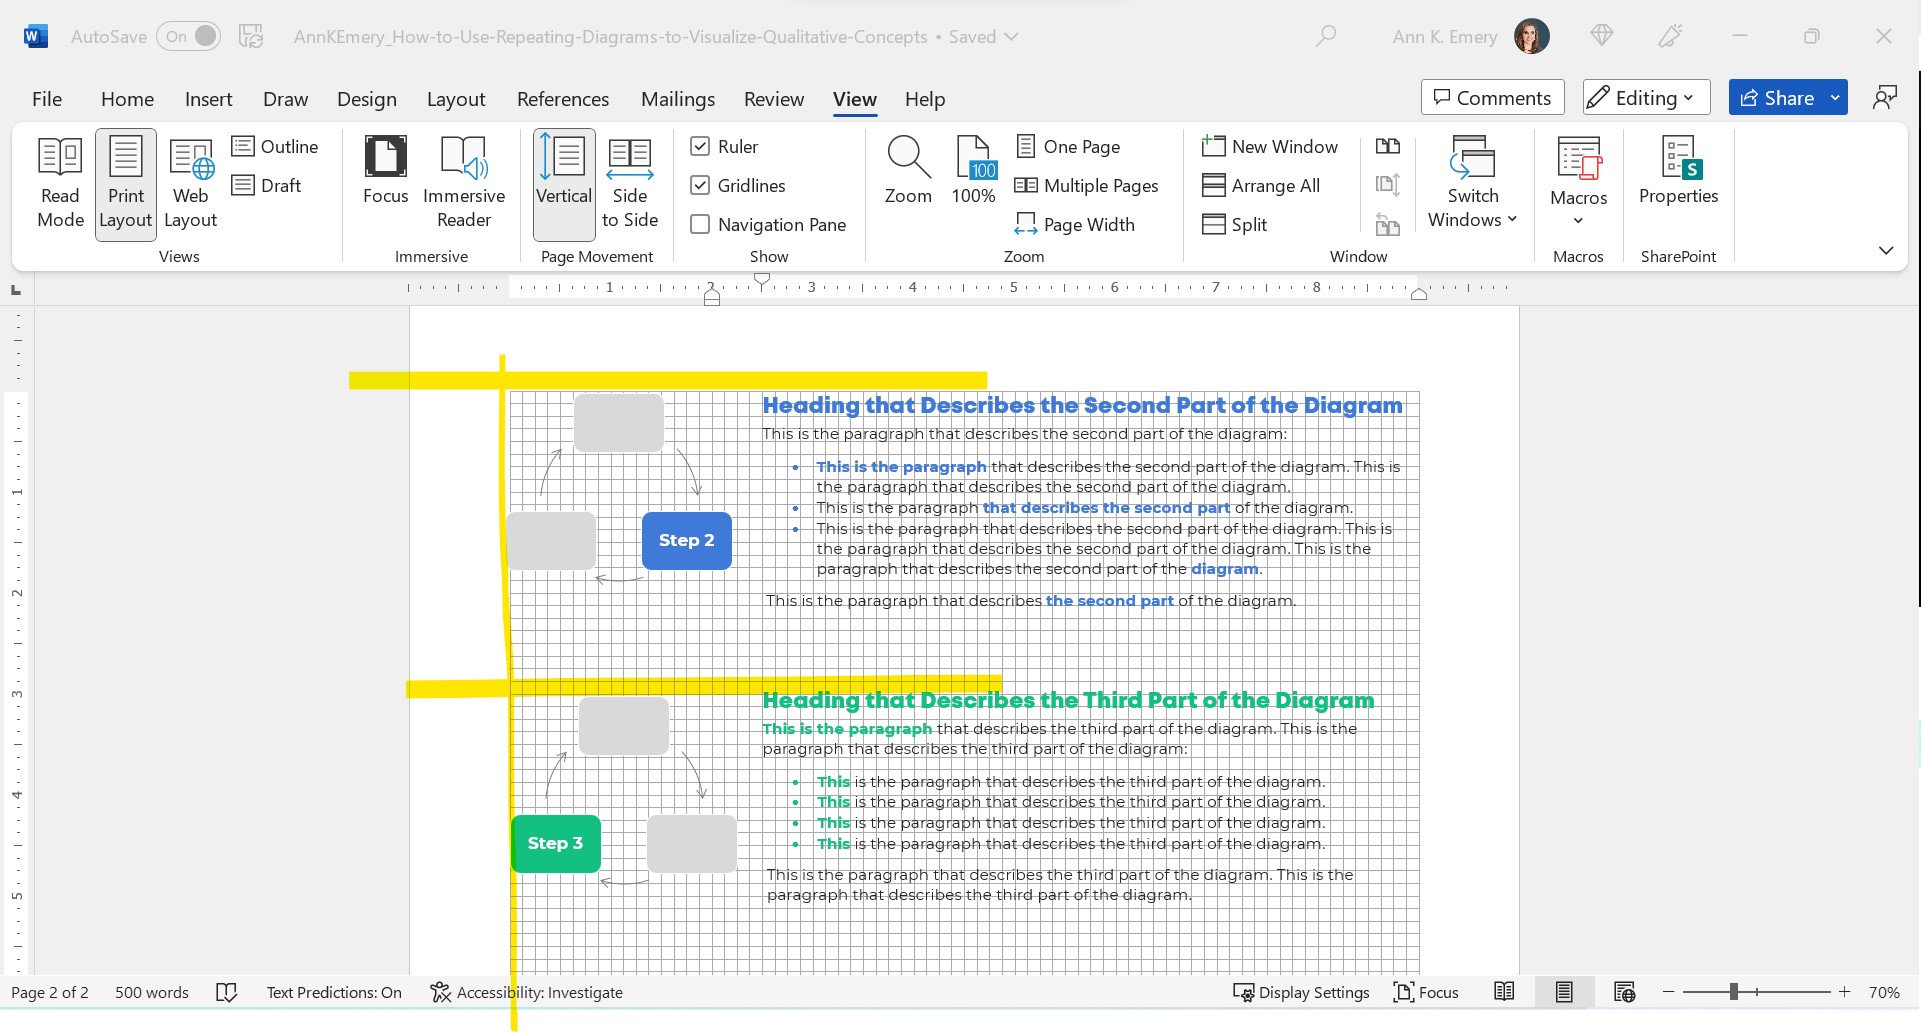
Peek at the document with the gridlines on. Make sure the diagrams are aligned with each other.
The Final Product: Repeating Diagrams
I don’t care that it takes up two pages instead of one.
Two great pages will beat one lousy page any day of the week.
Yes, your boss might give you a made-up page limit. “Make sure everything fits on a page!” Those limits were created because bosses got tired of Text Walls. And, because we used to print a lot.
Nowadays, people don’t print as much. I think the pandemic was a major turning point. With everyone working remotely, nobody had access to the office printer anymore. Any who wants to pay to print at home??
I’ve never, ever heard complaints about two accessible pages vs. one inaccessible page. The word count is the same. (Well, I added some headings.) But the information is richer because we’ve added a diagram and then explained it piecemeal.

Adapt as Needed
Use can use any diagram you need—a cycle, linear process, pyramid, or concentric circles.
You can do this in Word.
You can do this in PowerPoint.
You can do this in Canva.
You can do this in Publisher.
I’m software-agnostic. I don’t care which software program you use. When formatted well, you’ll get the same high-quality end result regardless of which program you’re using.
In this example:
- The diagram was wide, so when I introduced it, it needed the full width of the page.
- When I repeated the diagram, none of the words (“Phase 1”) fit, so I deleted them.
Adapt as needed!!!
Download My Word Document
Bonus!
Want to see how I arranged everything inside of Word?
You can download the document here: https://depictdatastudio.gumroad.com/l/UseRepeatingDiagrams
3 Comments
This blog post is so easy to review and imagine how I can integrate into my work! Thank you, Ann!
Thank you! I’ve been meaning to write about this forever. It’s inside courses and client workshops, but hasn’t been on the blog. Until now!! 🙂
Also, please keep me posted when/if you apply this. Can’t wait to see which diagram you choose, how you repeat it, etc.